This page illustrates an imperfect example of converting data using the read pdf to excel program. In the example, you need to delete blank rows that appear when you get raw data you get from the PDF file. In this and other more complex examples you should use the single data in rows method and you need to do some transposing to get the titles moved around properly. Hopefully you can see how the program can be used when data does not come out in a nice smooth manner from a pdf file.
My friend Karnen sent me the following e-mail. (I think Karnen may have been one of the first people to subject himself to torture by reading my book. He also sends me challenging questions about corporate finance, WACC and valuation.)

Programs to Download for the Exercise
To solve Karnen’s problem, you need to use the generic macro program to get rid of blank lines and then use the read pfd program. To try this you can download the file that Karnen gave me and then work through the issues. I should only take a couple of minutes.
In addition to the PDF file, you will need the read pdf program and the generic macros. You can download the programs below. The generic macro programs is needed for deleting blank rows and the read pdf program is central to re-formatting.
Step 1: Copy and Paste the PDF Data
When you copy the data, do not use the horrible Microsoft Explorer — this puts the data in a single row. The best option is to use Google Chrome. This is not because I am somehow pro Google. It is because it works. When you use Google Chrome, make sure you copy with Unicode Text as illustrated below.

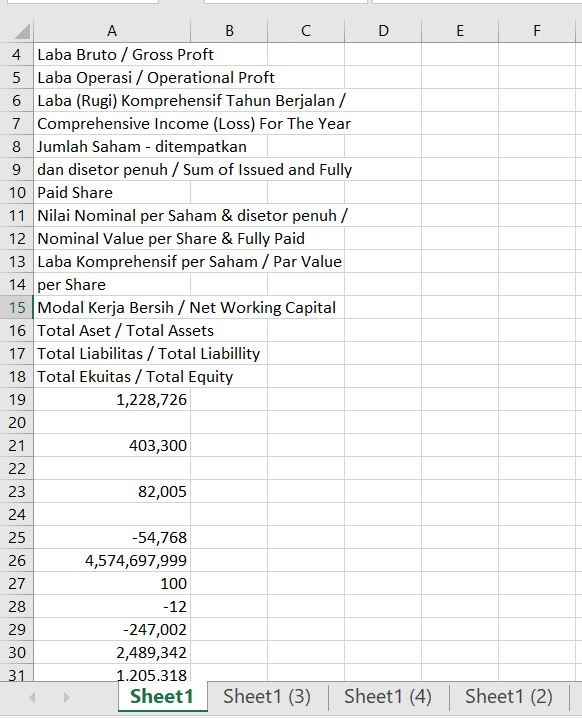
When I first read in the Pdf files, there were some blanks (the second time there were no blanks, I have no idea why). The screenshot below shows the case when some blanks were read in. This is the example I will use below as it is a bit more difficult.
Step 2: Clean Up things Manually
This second step is the step I hope you do not have to do. If there are no blank spaces in the data, go to the next step and skip this step. But in the case were blanks were read in for some unknown reason, the blanks may have to be removed. To remove blank rows, I created a macro in the generic macros file. So, open the generic macro file (this can of course be opened at the same time as the read pdf file). Then press the CNTL, ALT, C sequence to get the colouring menu. On this menu there is a option for deleting blank rows as shown in the screenshot below. Sorry about the crude circle.
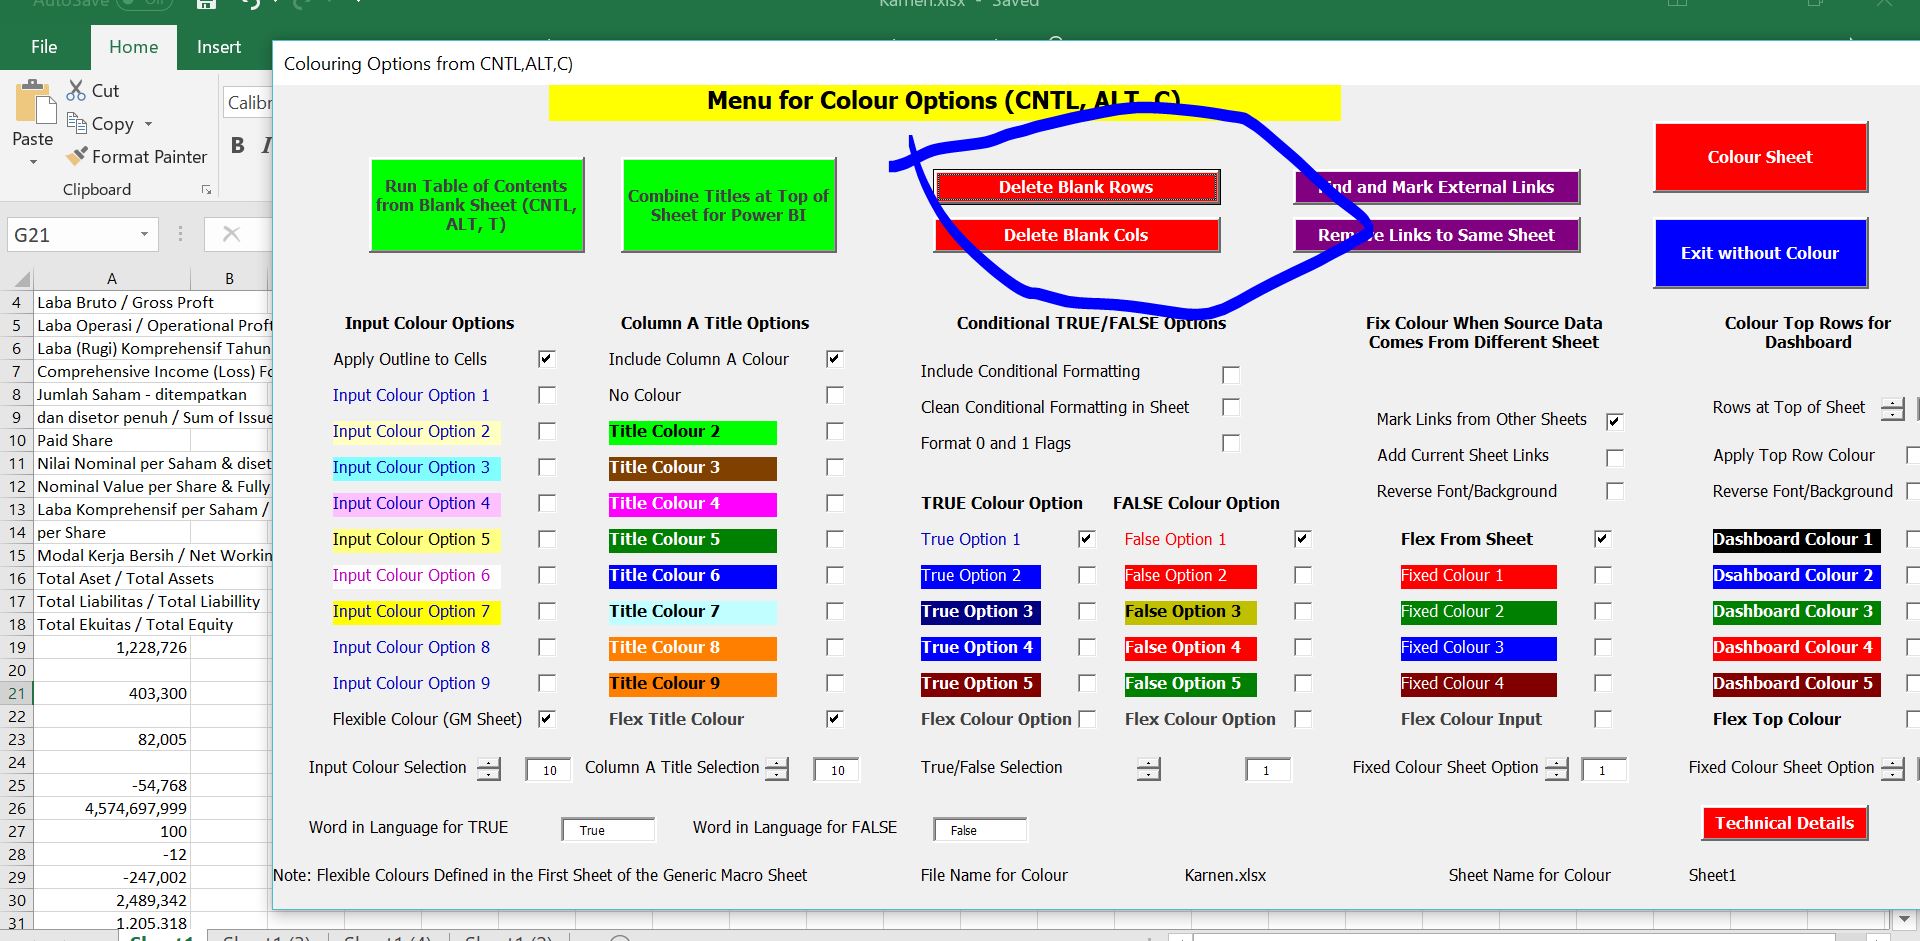
After you press the delete rows button, a input box message appears. In this box, you enter the column number to test for deleting rows. This means that if the column you selected has a blank, the row will be deleted. The screenshot below demonstrates how you enter the column number (not the column letter).
![]()
After you enter the column number, the rows are deleted and the results are put in a new sheet (in case you do something wrong and to much is deleted). The manner in which the blank rows are deleted is demonstrated in the screenshot below. Notice that sheet1 — the place where the original rows were read in is now sheet1(5) — this is a new sheet with the deleted blank rows. The original sheet is still there.
![]()
Step 3: Re-Format with Read PDF Program
Once you have a clean column of data, you can use the read pdf program to clean up the data. You should use the option for data in separate columns or the second option. You need to count how many rows there are to represent a single column in the data. In this case there are eleven rows as illustrated on screenshot below which is from the pdf file.

Next, as usual, press SHIFT, CNTL, A and get the menu. Then select the second option as illustrated in the screenshot below. After you press this option you will get a second screen. Notice how I am trying to use the marking tool.

When the second screen appears as shown below, you select the option for the fixed number of rows and you enter the number 11 that you counted on your fingers. Entering the check box and and the number of rows in a column from the pdf file is illustrated in the screenshot below.

When you press the green button named Re-Format, the data should be re-arranged. The manner in which the data are re-arranged is illustrated in the screenshot below. The data is starting to look like you can work with it, but you had to do a little re-arranging and transposing, the subject of the next section.

Step 4: Transposing the Data
I have wasted a lot of time attempting to automate things. I should have made the program transpose the data back to the original format. I should also try to put the data together with the titles. But I think just about everybody in the world knows how to copy and paste special with the transpose box clicked. I am not even going to put a screen shot for this.
Once you have transposed the data you can manually move the data to correspond to the correct titles. If this takes more than a few seconds you may be too old like me. So here is the final result in the screenshot after the transpose and arranging. Use the ALT E, I, S with step -1 for putting in the years.
