This page describes how to use macro add in’s that allow you to efficiently and effectively format a financial model. If you open the generic macro file and leave it open along with your file, you can press CNTL, ALT, C and the select a bunch of options for colouring. Note that when you open the file you must press the initialise button. The formatting techniques and the copy to the right macro comes from an excel file named generic macros that you can download below. This file includes a macro to copy to the right that is attached to SHIFT, CNTL, R and it has comprehensive formatting process that is attached to CNTL, ALT, C. The goal is that you can efficiently format your financial models without wasting time. The formatting process that is attached to CNTL, ALT, C includes (1) colouring input cells with an option to include outlines; (2) colouring the titles of different sections of your sheet; (3) colouring and outlining the a particular column of a sheet that typically includes sums; (4) colouring the flags (masks, switches) of your sheet in different colours; (5) colouring cells that are linked to a different sheet from the tab colour or or alternative colours; and (6) creating a dashboard at the top of your sheet.
To run these formatting, copying to the right and other macros, all you have to do is have the file open the generic macro file below because you can run macros from other open files (e.g. say you are in mybook.xlsm, you can open generic macros.xlsm and run any of the macros in your sheet). I think it is much better to just open the generic macros sheet and enable macros than creating some kind of add-in that takes control of your computer. Then the CNTL, ALT, C and the SHIFT, CNTL, R should work just fine. The generic macro file also has a lot of other macros that may be useful are included in the file that is available by clicking on the button below. You can also download my powerpoint slides that work through the various issues.
.
.
Power Point Slides that Accompany Project Finance Modelling A-Z Analysis and On-line Course
.
For every single one of the more than 1000 excel files on this website I have not put any passwords on the macros or functions. This means you can look at the code and try to improve it yourself. (If you have some good improvements I would really like it if you send me your work). You can also copy the macros from this file into your file or your personal workbook if you do not want to open generic macros every time you open your file.
.
Instructions for Downloading Files with Macros
.
Using the Generic Macros File to Colour Cells with CNTL, ALT, C
I became irritated when I was going through some technical issues about circular references with a young person who seems to be very proud of the way he colours his spreadsheet. I certainly do not claim to be a financial modelling artist. But this formatting and colouring blah blah blah seems to be important to many people. Because I get so frustrated by people who see to think colouring is the most important skill in financial modelling; who do not use colouring to help structuring the model; and, who do not use colouring to make the model transparent, I have made a colouring macro in the generic macro file.
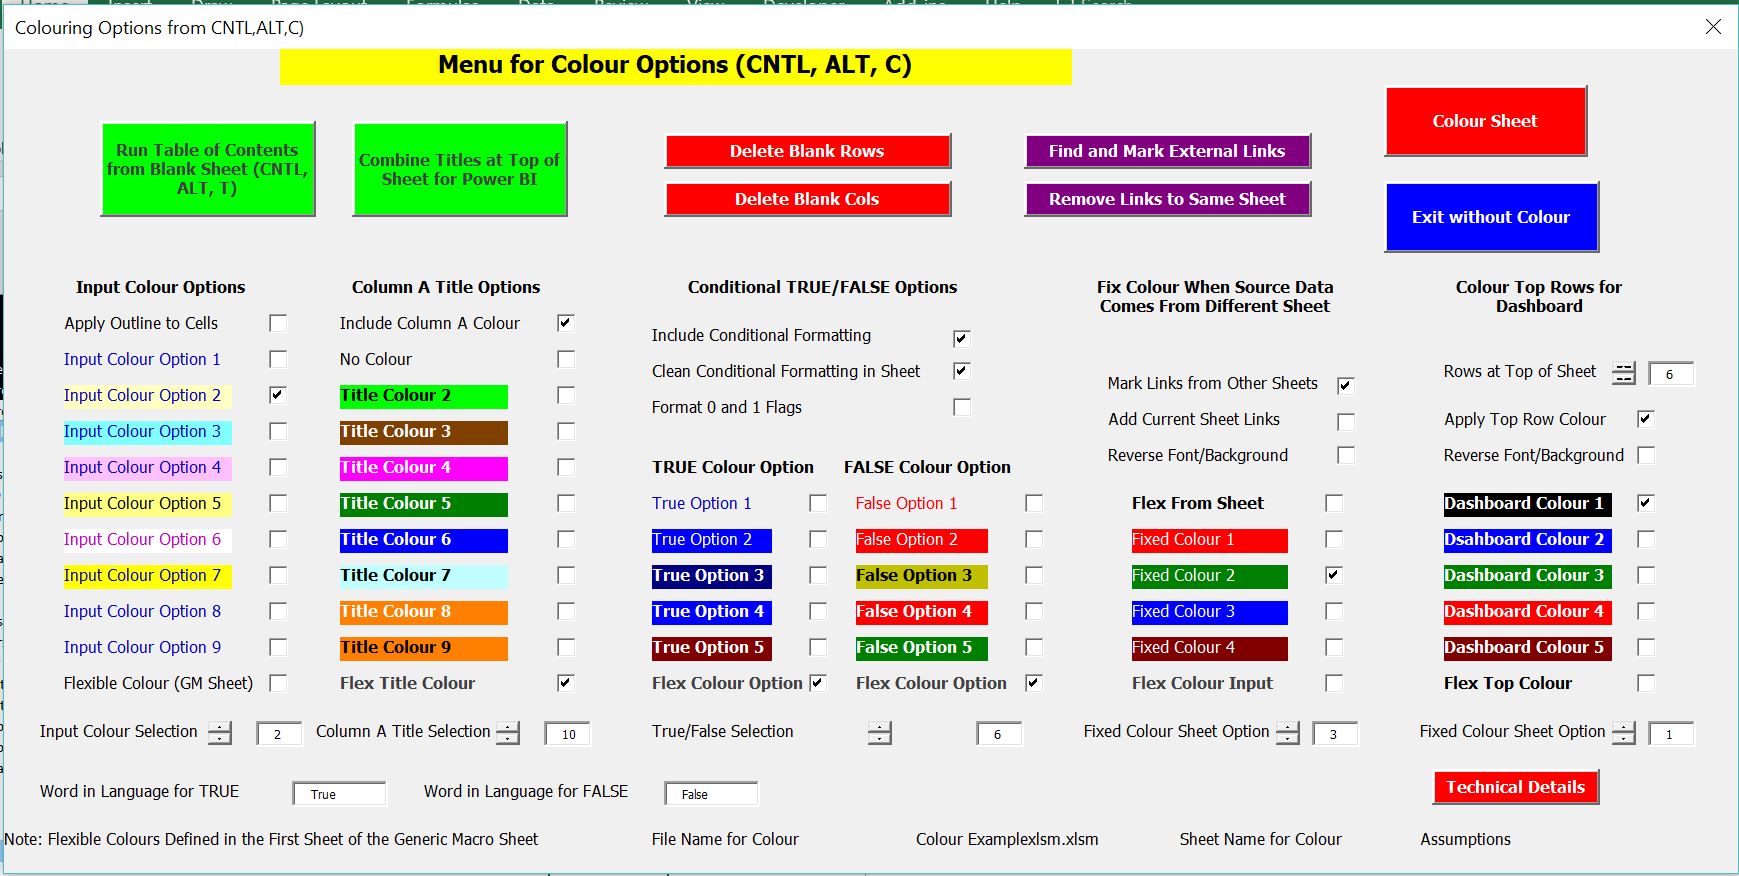
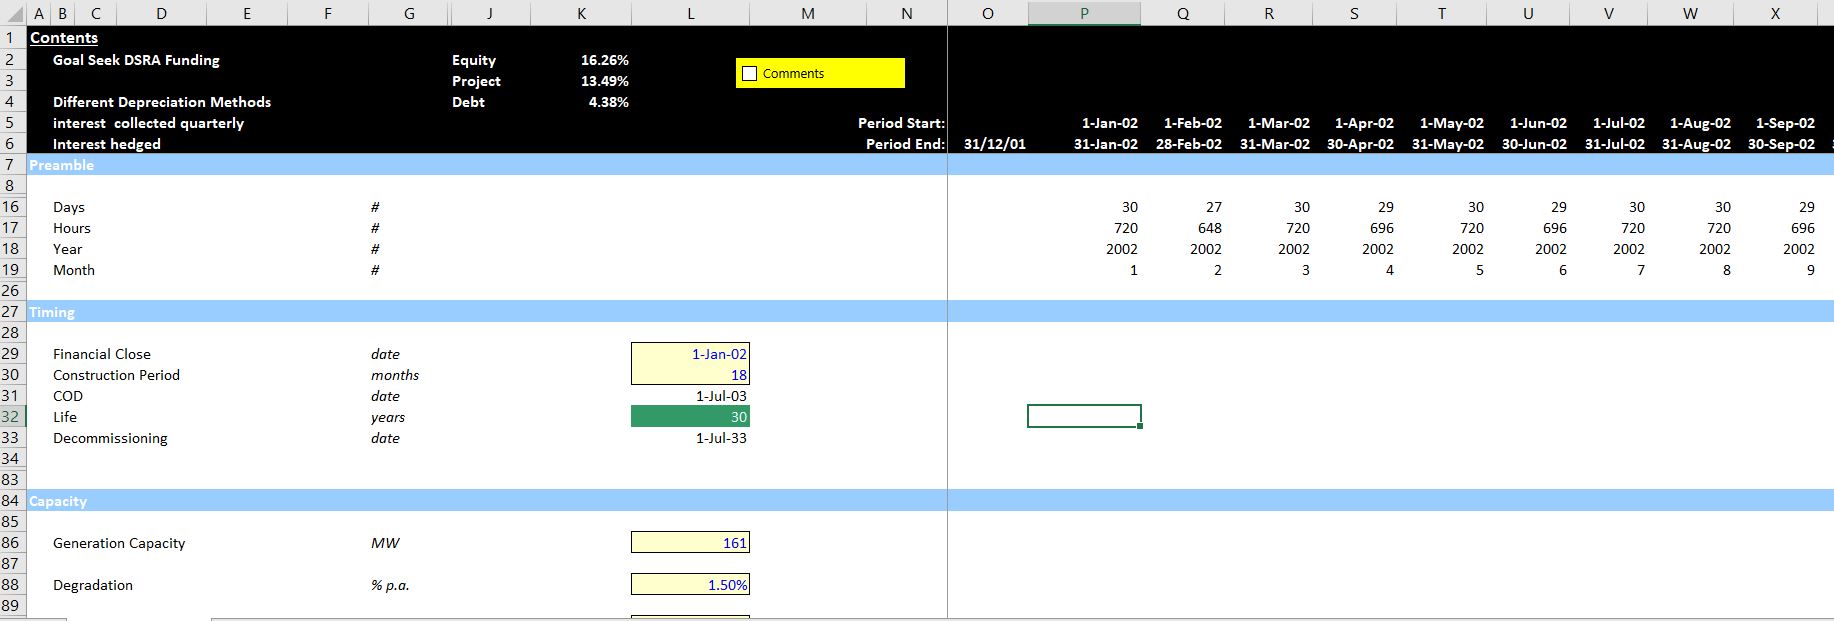
To illustrate how you can use generic macros to stop wasting time with all of the silly spreadsheet art, I have made a few screen shots below do demonstrate how it works. The first screen shot shows the starting point before the CNTL, ALT, C is used from the generic macro workbook. To use the flexible colouring options in the generic macro file, open the generic file along with the file you are working on. The press CNTL, ALT, C and a menu something like the one illustrated on the screenshot below should appear. Note that you can use this user form to run the table of contents and do other thinks like removing links to the current sheet. To implement the colouring macros, press the red button at the top right of the form.

I hope that most of the options on the options on this menu are self-explanatory. The key behind this process is that you can run the CNTL, ALT, C menu as many times as you like and press the red button to re-colour. In the left column, you can select different options for colouring direct inputs. (5*3 is not an input). The next column to the right allows you to make similar colouring selections that will apply to any item that is in the first column. If you do not use Column A for structuring your sheet, then make sure the check box next to the “Colour Column A” is not checked. Continuing to move to the right, the next set of inputs allows you to use different conditional options for TRUE and FALSE switches in your sheet. Finally the column to the right allows you to use different options for numbers that come from another sheet. When colouring cells that come from another sheet, you can use the colour of the sheet in the sheet name or you can colour anything that comes from another sheet with a green, red or blue colour.
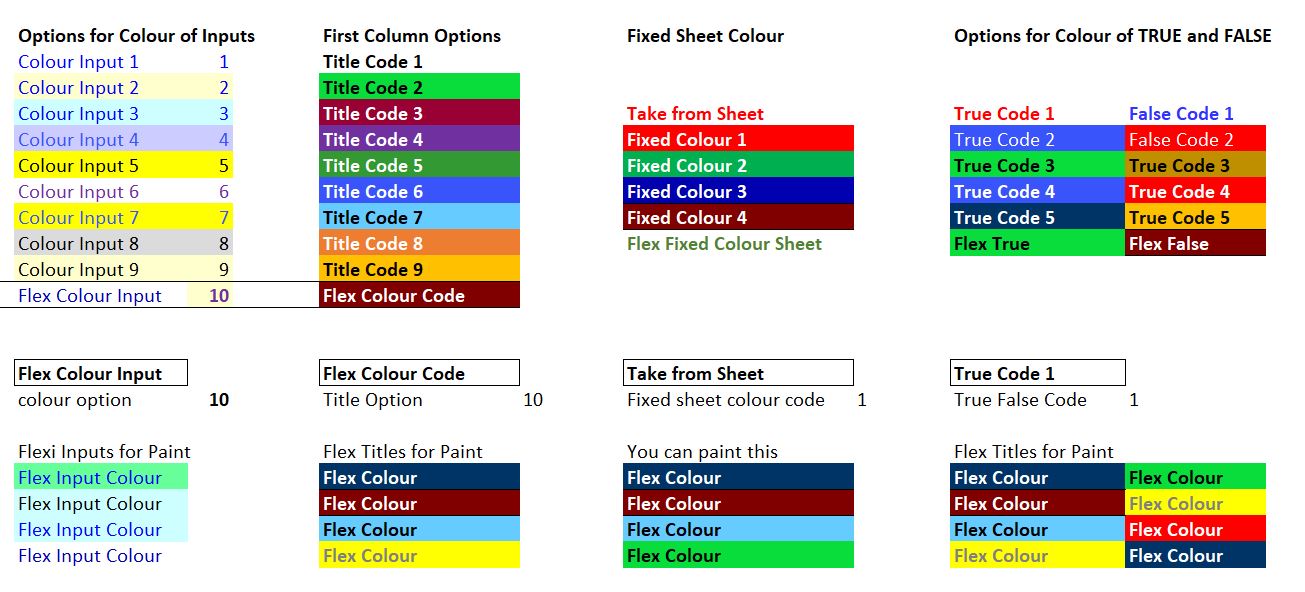
If you want to be more flexible in colouring various cells in your sheet, you can use the flexible colouring options that are at the bottom or each section. These options are called the flexible colouring options. If you want to modify the flexible colouring options that are at the bottom of each section, you should go to the fist page of the generic macro sheet. On this sheet you can use the paint brush or copy paste special as formats to put your own formats in the sheet. After making your own colouring options, you should press the button on the generic macro page that is called Initialisation. The screenshot below illustrates the page in the generic macro sheet where you can change the colouring options.

After you have pressed the red button and colour the sheets, the page in the initial screenshot should look like the screen shot below. Note that you can keep pressing the colour sheet after you are working on your model.

.
The video below is long and about carrying charges, but I have used this video to introduce features of the Generic Macros file including screen colouring with CNTL,ALT,C and copying to the right with SHIFT,CNTL,R.